Water Part 2 – Photographing Lakes and Oceans
As the title implies this is the second installment of a series on photographing water. Last time I covered rivers and waterfalls. Today let’s cover lakes and oceans. At the outset I must apologize for treating oceans as if they are just big lakes. With their dynamics flows and movement they deserve a separate article, but maybe at a later time. For our purposes today oceans are just big lakes whose far shore cannot be seen.
The Problem with Photographing Lakes
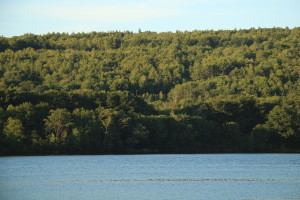
Have you ever heard something like this? “The lake was so beautiful. It just sparkled in the sun. The sand was clear and white. I never saw skies so blue, water so clear. You should have seen it. Oh wait I’ve got a picture here. Just you wait until you see it…,” a phone or a print is shoved in front of your face. There may be some expectations. You may get your hopes up just a little but, sure enough, this is what you see:
 “Well, it’s not a very good picture. You really had to be there.” Even if they don’t have the photo with them, that’s OK. You already know exactly how it’s going to look. Maybe their spouse is standing in front of the water with the horizon line cutting them off at the neck, maybe there is a round orange ball of a sun about to take a dip, but no-matter the minor variations, this picture is pretty-well standard. People are generally terrible when it comes to pictures of lakes and oceans. No matter how you split it, it is water and not-water with a line between them. If the above scenario is familiar to you then it should be apparent that lakes come with challenges of their own.
With that in mind, what is missing and how should a photographer add it? Lets look at two things: 1) Perspective and 2) Complexity
 Perspective – It is only in relation to other objects that we get an idea of the shape, size, blueness, calmness, or any other feature that might give a clue about this body of water. The far shore or a plain horizon line does little to help with this.
 Complexity – Even if you can’t get a perspective that expresses the shape or size you can still include some foreground detail to add a bit of complexity. Patterns work best for this as they add interesting features without adding clutter.
The most popular attempt to add complexity is a sunset. I went to school in a city with a very large lake on its western edge. Every day there was, and still is, anywhere from a few to a few dozen students with cameras who would walk to the very edge of the lake, get out of the way of any obstacles blocking the shot, hold the camera at eye level, zoom in as far as their lens would go, and take the exact same picture… the same as the one they took yesterday… the same as the person next to them is taking… the same as at every other west-facing lake at sunset. I have taken some of these… we all have, but in terms of adding perspective or complexity this is level 1 out of 10. Even in the case of a spectacular sunset, this is still just a photo of a spectacular sunset. Instead you should aim for a spectacular photo of a sunset. Then, when the sky cooperates, a spectacular photo of a spectacular sunset is what you get. What parts of this ritual has made these photos go poorly? All of them: standing too close, zooming all of the way in, removing all objects in the foreground, and holding the camera at eye level.
Toward a Solution for Photographing Lakes
Get Back and Go Wide – The far shore of a lake is the least informative and least useful. As the body of water gets larger it becomes even less so, until it is just a straight line, and even techniques like the Rule of Thirds will not help you make that line more interesting. An interesting foreground is the most important factor in any good nature photograph. This is a general principal that extends beyond pictures of lakes. It is equally true of all landscape, sunsets, rainbows…etc. It is just more useful for lakes since you don’t have much else. The near shore of the lake is what you have to work with. Step back, get out a wider lens. Try to include something to show how large, or rugged, or blue the lake is in relation to the near-shore objects that you include. Don’t lose track of the reason that you are widening your view not to take in more of the water, but to get something in the foreground o add perspective. Anyone who has ever gotten out their wide angle lens to try to show the size of the ocean has experienced this first-hand. The far shore will still give no perspective and no indication of size. The horizon line just shifts a bit higher or lower and the boring static shot is unchanged.
 Get High – No, not that way. Natural bodies of water always are situated in depressions. Is there a hill or mountain with a view down onto the lake? Shorelines are complex shapes the cannot be appreciated fully from the same height as the shore itself. This also is very good at relaying information about size and how the lake fits into the overall landscape. The farther up you are the more useful that far shore becomes again as well.
 Get Low – You’re down at the shore but don’t have the time or ability to try the high shot, What now? The closer you get to foreground objects, the larger, taller, and more prominent they become in relation to the background. The shore in front of you is probably filled with features such as stones, grasses and other plants that can gain prominence and help make the shot if you can get the camera down lower. Sit, squat, lie, or use a rotating viewfinder to get the camera down as low as possible. It will give a new perspective to an otherwise boring shot and provide many framing options where none existed before.
 Reflections – reflections are an excellent way to show the stillness of a body of water. They give perspective, complexity, and context so they are very powerful, and are one of the few instances where the far shore becomes more important than the near shore. To emphasize the pattern of the original and the reflected copy it is even acceptable to have the flat horizon line running the whole width of the photo, though you want to avoid putting it right in the middle. Usually it’s best to put the horizon somewhere between the midpoint and one-third of the way from the top.
Please Step Away From The Lake
If you can’t get up or can’t get down, get back. There are still interesting shots to be made by putting foreground objects between you and the water. There are two basic techniques for this – screening and framing.
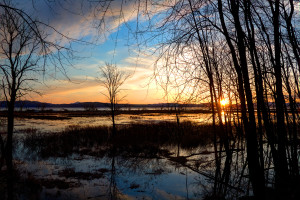
Screening – A screen is a shot taken though something that adds an overall pattern to the subject while still leaving the main subject recognizable. An obvious general example would be shooting through a wire or fabric screen. An example of where it comes into play for photographing lakes would be shooting through the silhouette of tree branches to show the lake.
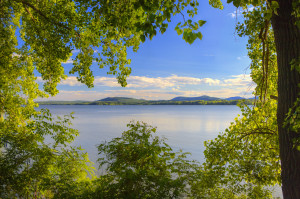
Framing is a separate but related concept. It can also involve silhouetted objects in the foreground. It is exactly what the name implies, using the objects in the foreground to make a frame around the central area of the picture. Framing can range all of the way from an object or group of objects, such as leaves or even a literal window frame, bordering a central subject on all four sides. On a smaller scale the framing can be a right-left or top-bottom border. It can range all of the way down to multiple separate objects on all sides surrounding a clear center.
All types of framing are just specific examples of a more general best-practice in composition- keeping the edges active. I’ll cover composition principles in the next installment of this series. Briefly, make sure this is activity along all four edges of the picture. Make the framing deliberate. Add context. There are many landscape photographers, myself included, who believe that a good landscape photo should have not have any totally empty edges. To keep the eye active and think interested at least one object should enter or exit the photo on all four sides. Empty sides, empty water at the bottom, and empty sky at the top weaken your composition.
That should give you a good place to start. None of these above are hard-and-fast rules, and each situation will have different challenges and opportunities. They are more like reminders. The next time you are standing a few feet from the shore with the camera at eye level and pointed-out at that straight line across the water… think. Is there a better way to show this that doesn’t require telling other people that they “really needed to be there?”


Keith,
This blog/tutorial is so very helpful. Great writing, super information. I have some lake shots in mind to work tonight and have you to thank you the helpful hints. Excellent! Thank you. Patti P.
Thank You Patti. Always nice to hear when people find these useful. Jealous of that big lake with the mountains leaping out of it that you have, and hope to make it up that way in the coming weeks.
Good read! Thanks for the pointers.